Mixpanel Integration
Moveo One can connect directly with Mixpanel to import historical events and real-time streams — without requiring changes to your existing frontend or mobile code.
This lets you unify analytics, behavioral insights, and predictive models under Moveo One while still keeping Mixpanel as your main tracking layer.
Overview
Moveo One pulls data from Mixpanel using its Data Ingestion Workers.
You can choose to:
- Import historical user event data
- Sync ongoing events to Moveo One daily
And of course, alongside the integration with mixpanel you can have and maintain Moveo One native integration and thus keep both platforms aligned without double-tracking
Setup Steps
Step 1 — Get Mixpanel Credentials
You’ll need:
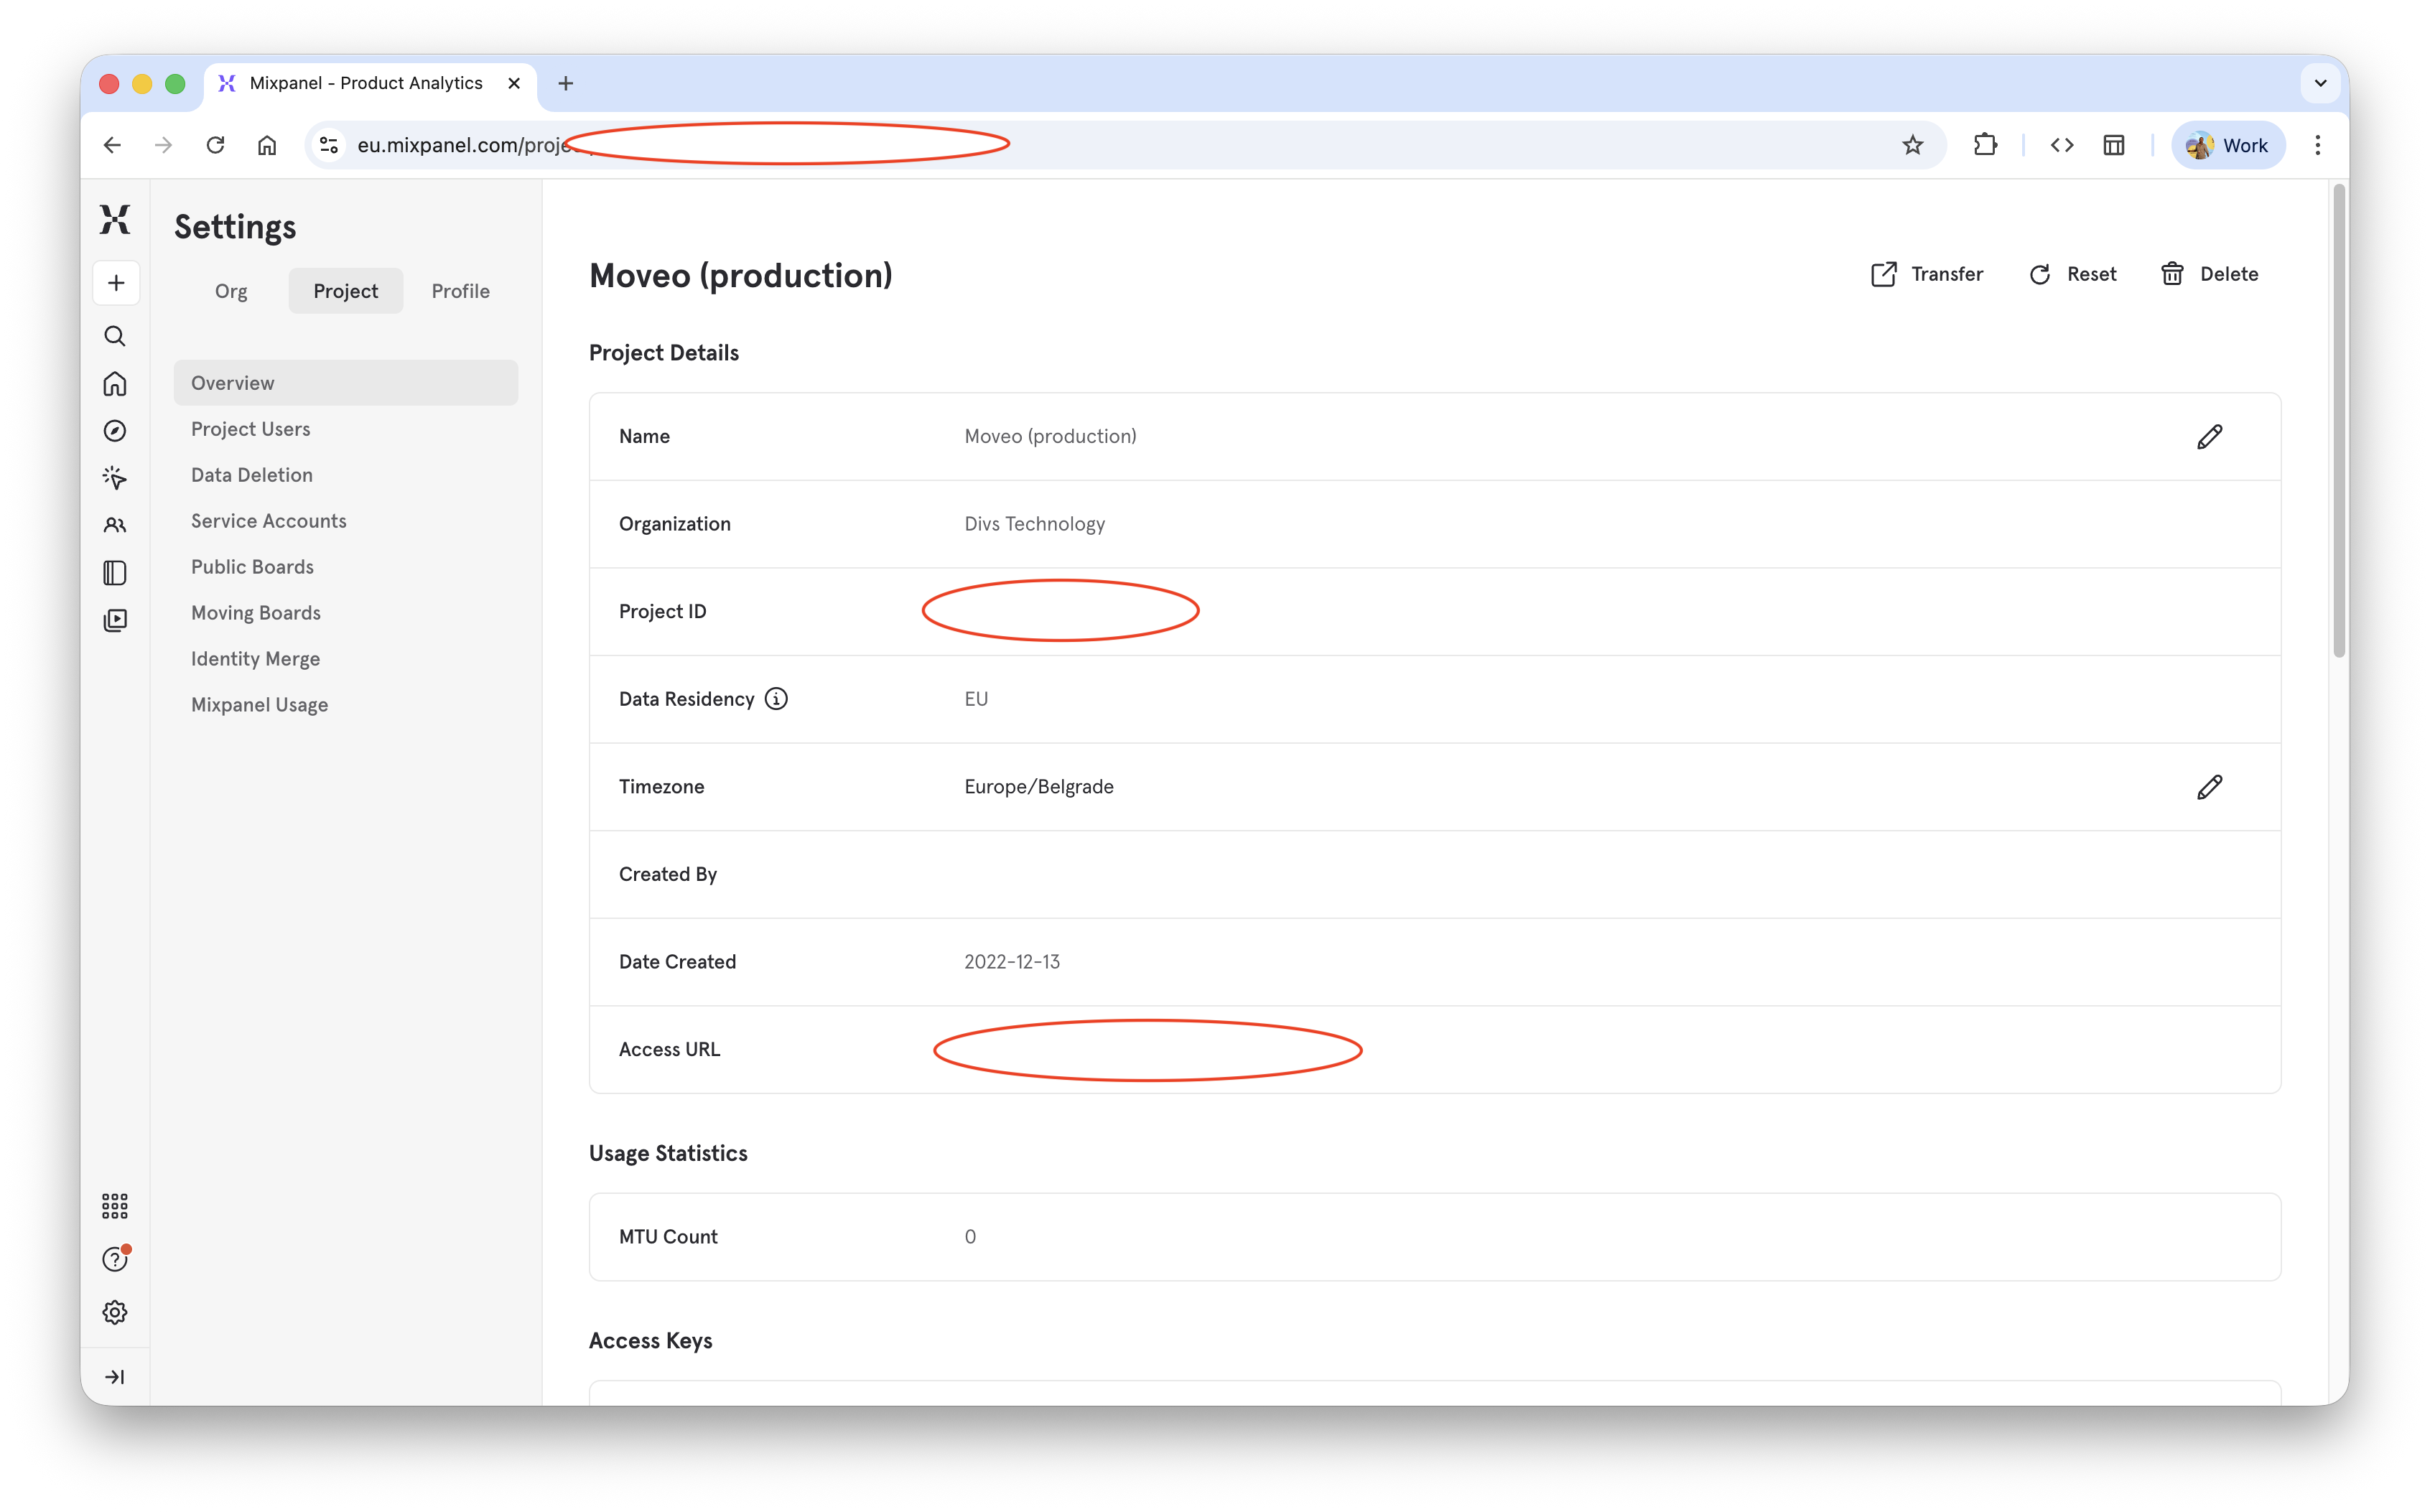
- Your Mixpanel Project ID
- A Service Account Username & Secret
- Optional: Region endpoint (US or EU)
You can find these in
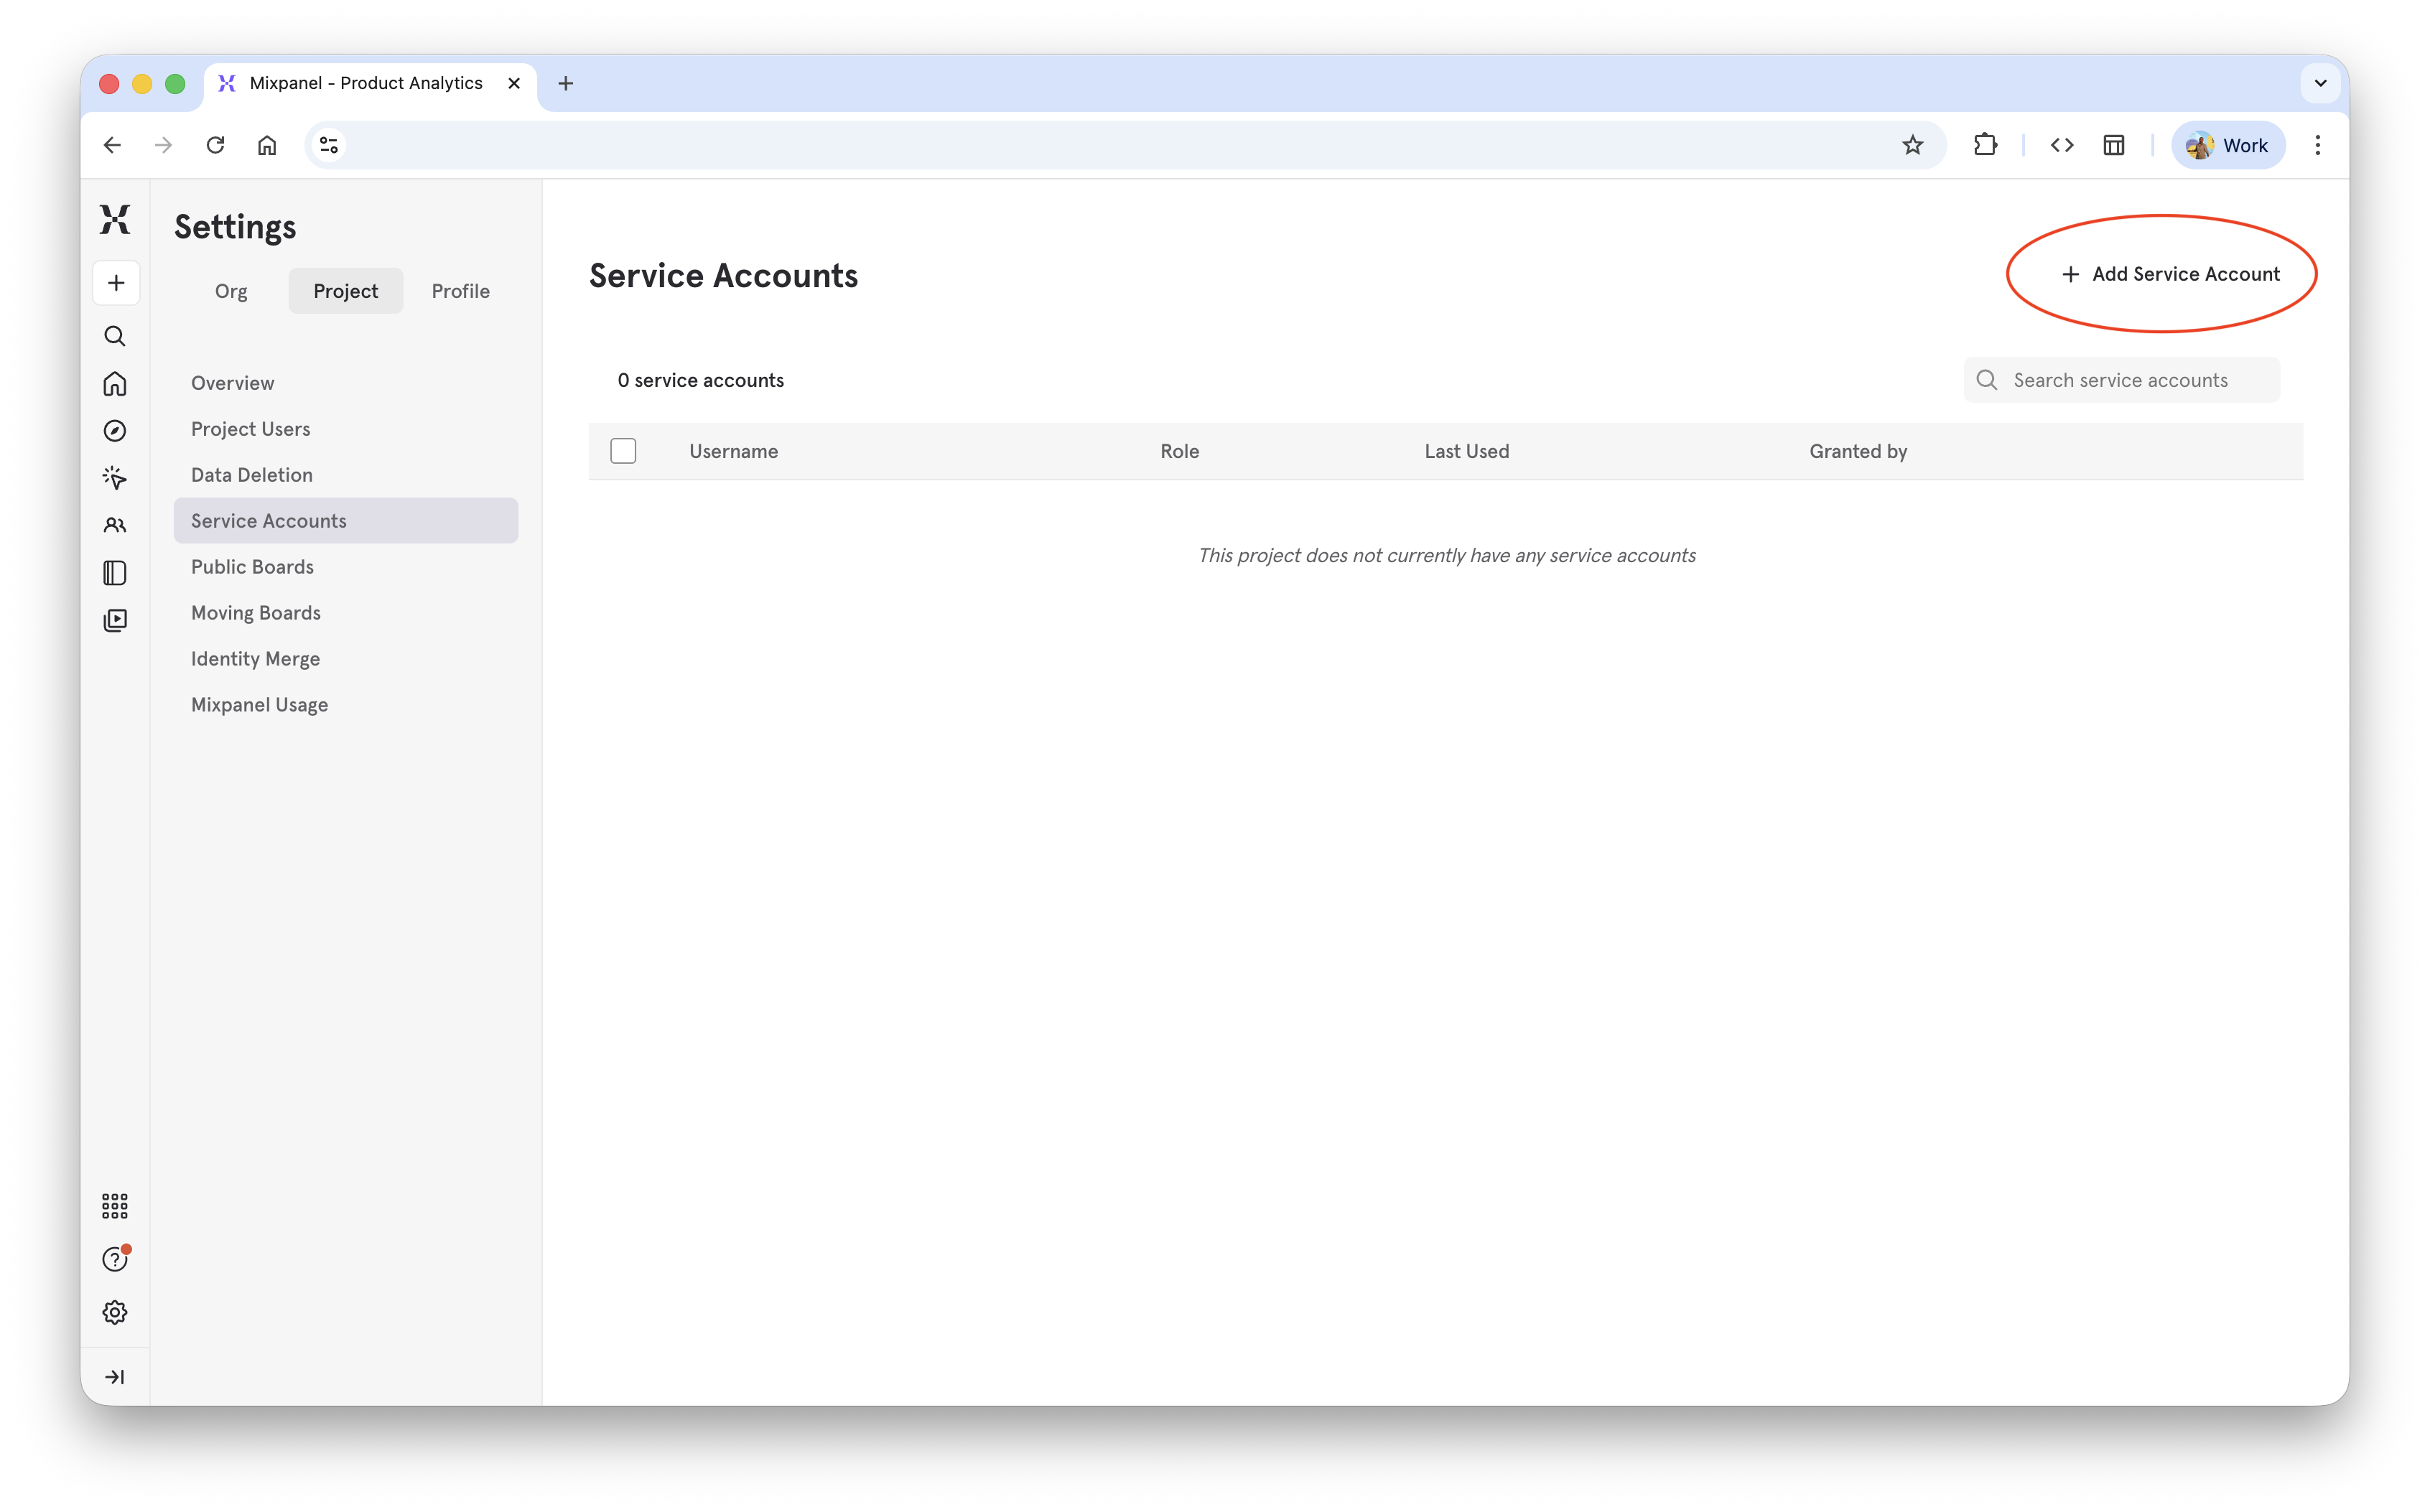
Project Settings → Service Accounts → Create Account if you have already used Mixpanel integration features, you'll find it quite easy to integrate.
Or follow Detailed instructions on how to do that.
1 — Select project
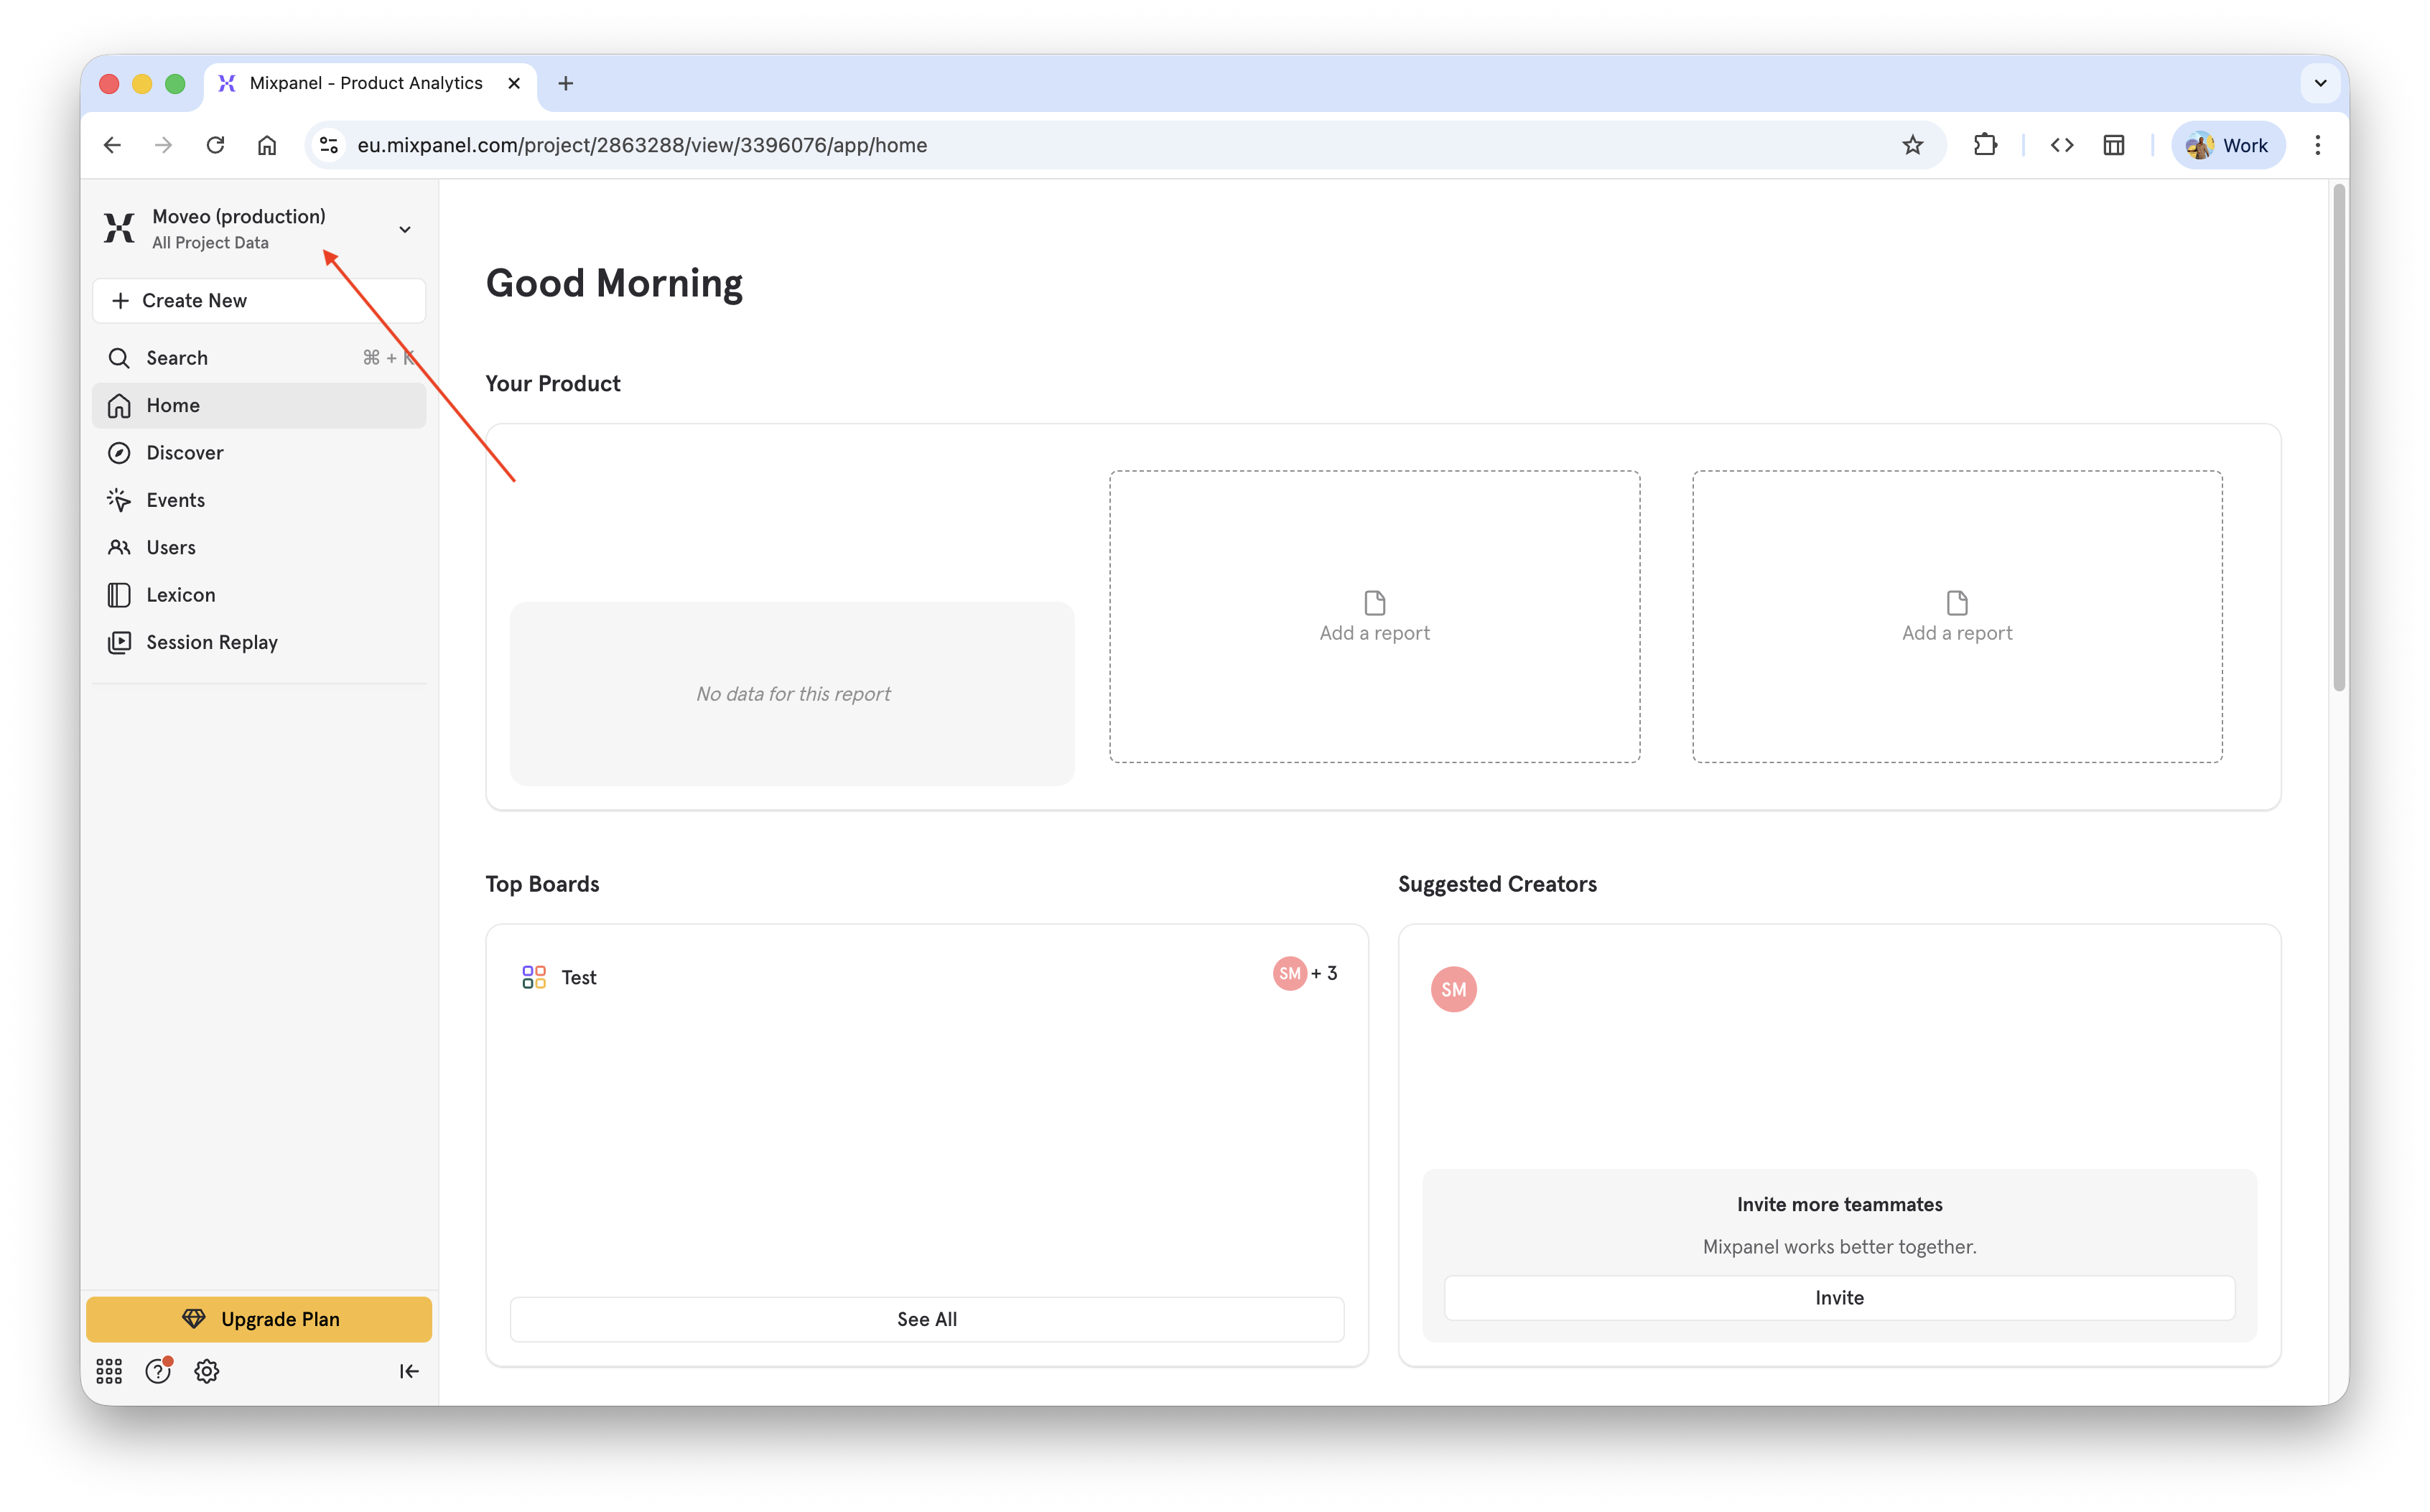
2 — Open project settings

3 — Find project ID
4 — Add service account
5 — Create Service account
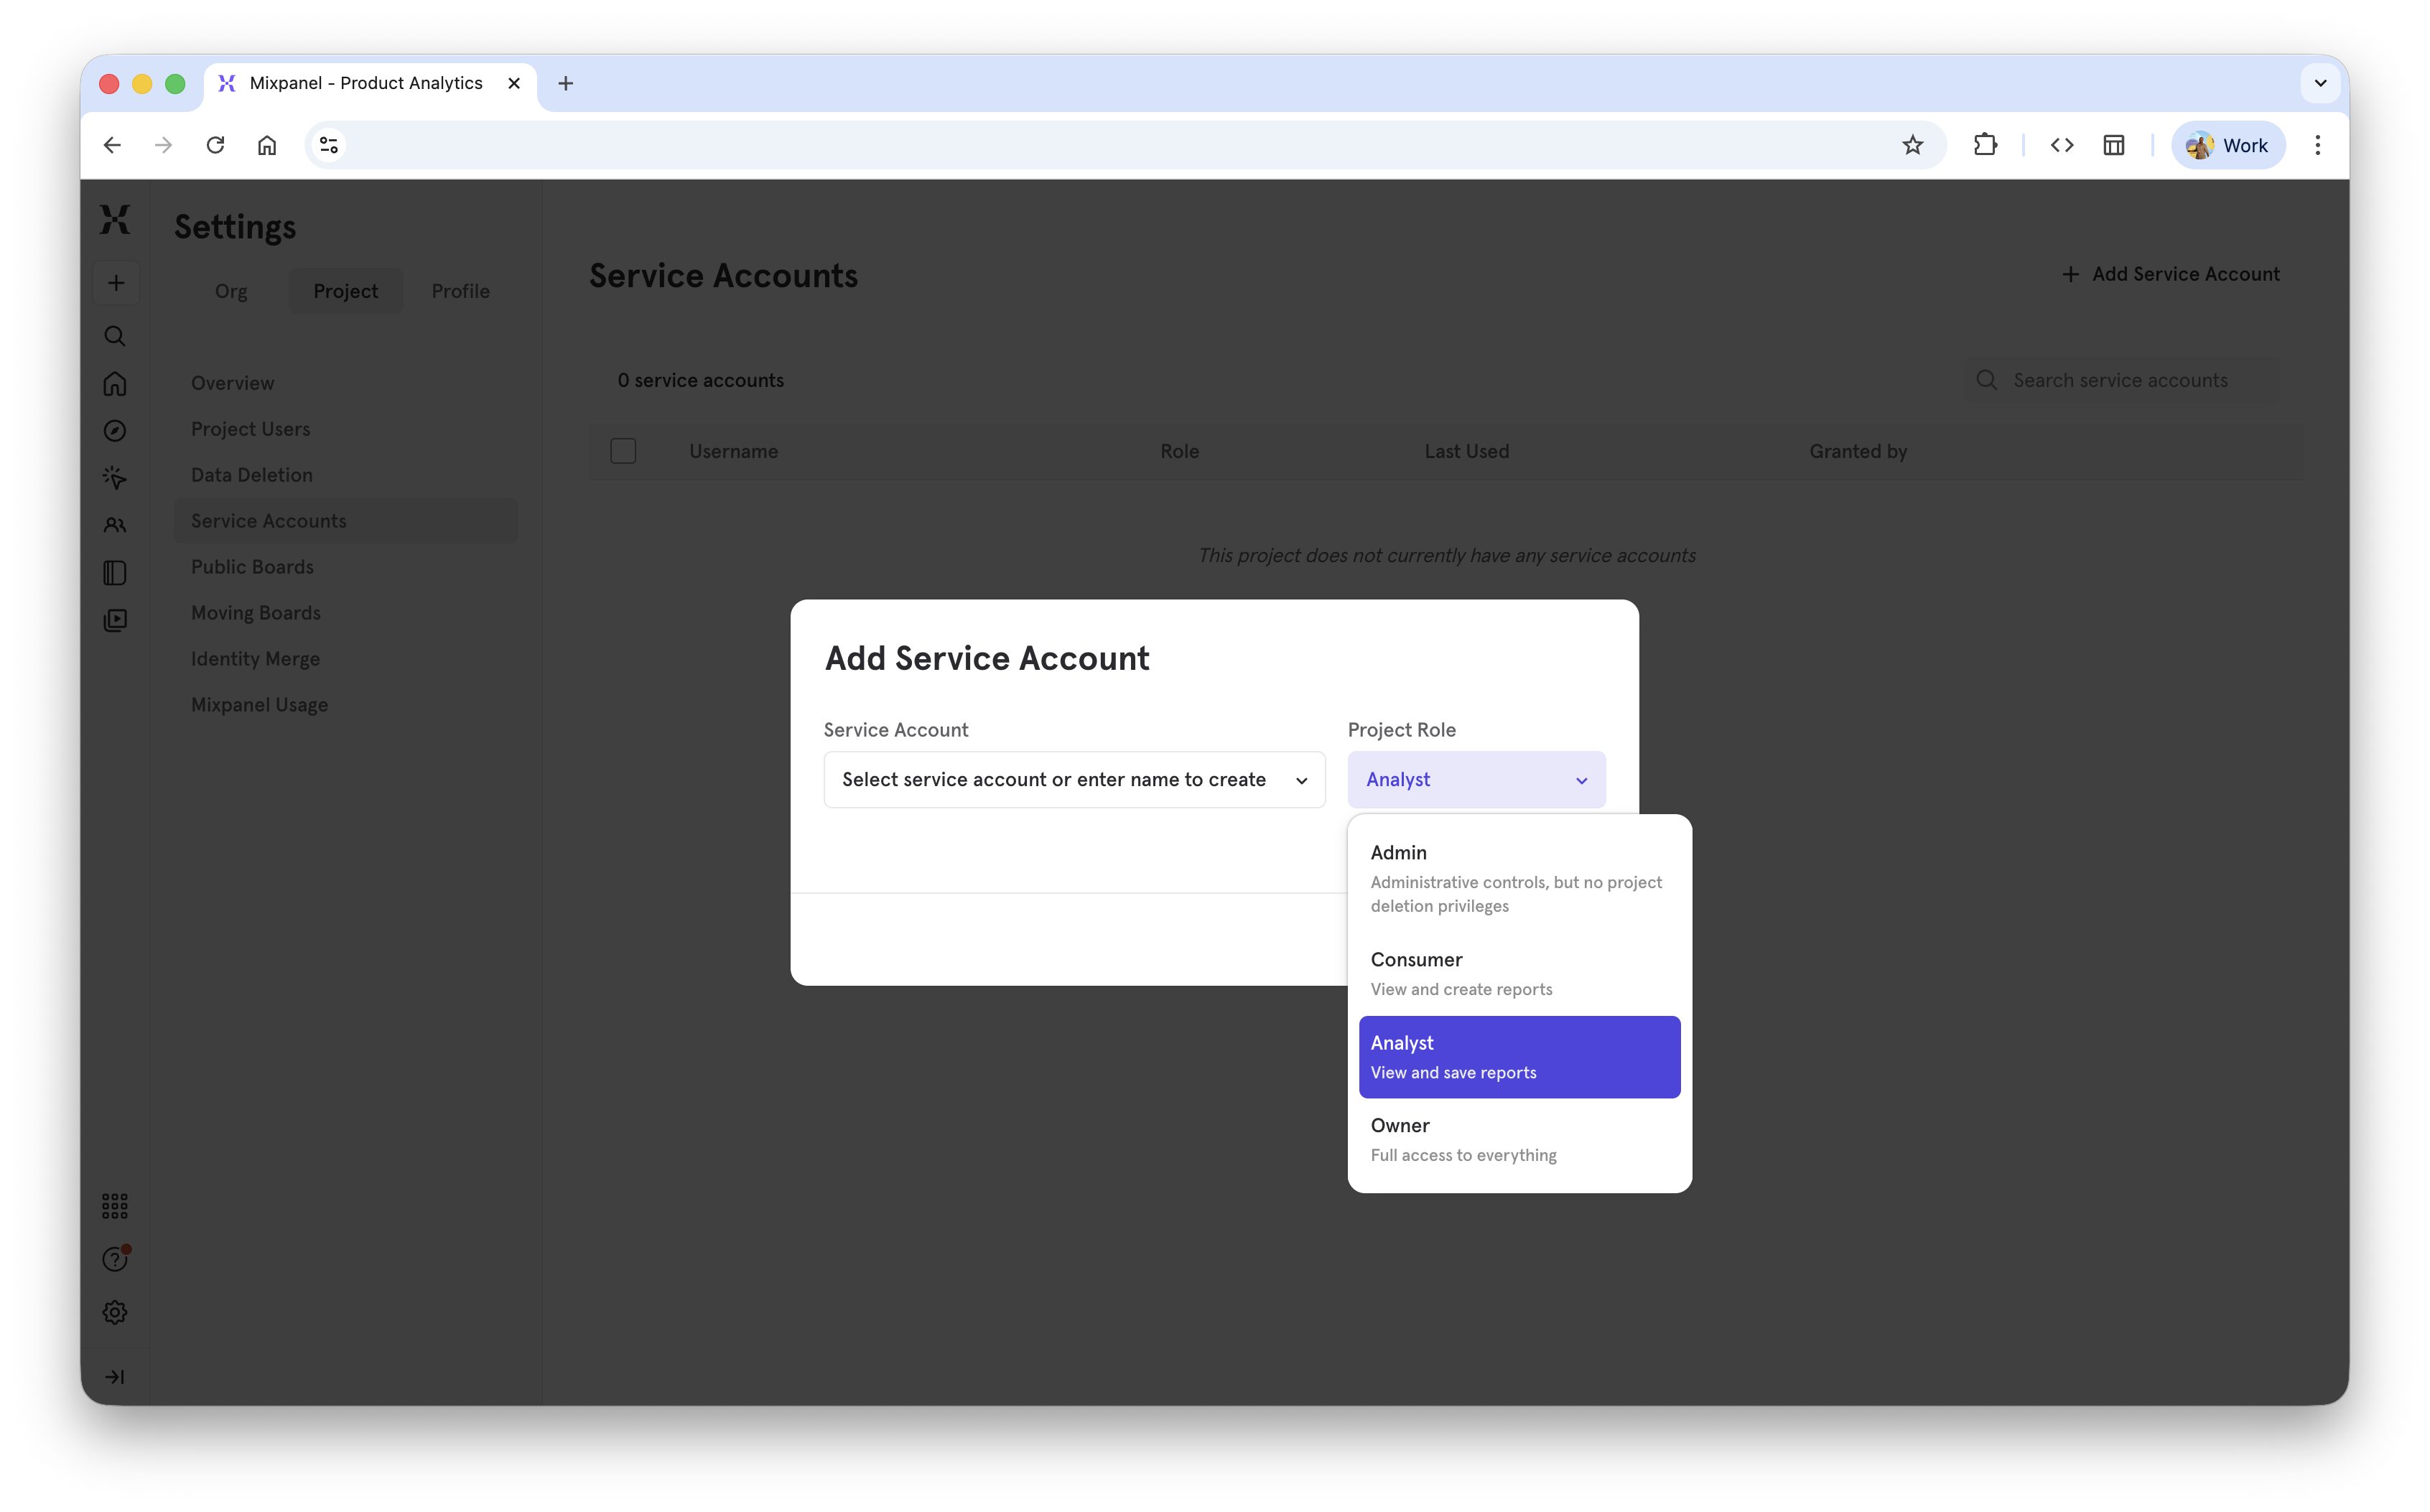
6 — Select role for service account (recommended Analyst)
Supported roles: Owner (not recommended), Admin (not recommended), Analyst, Consumer (might have issues)
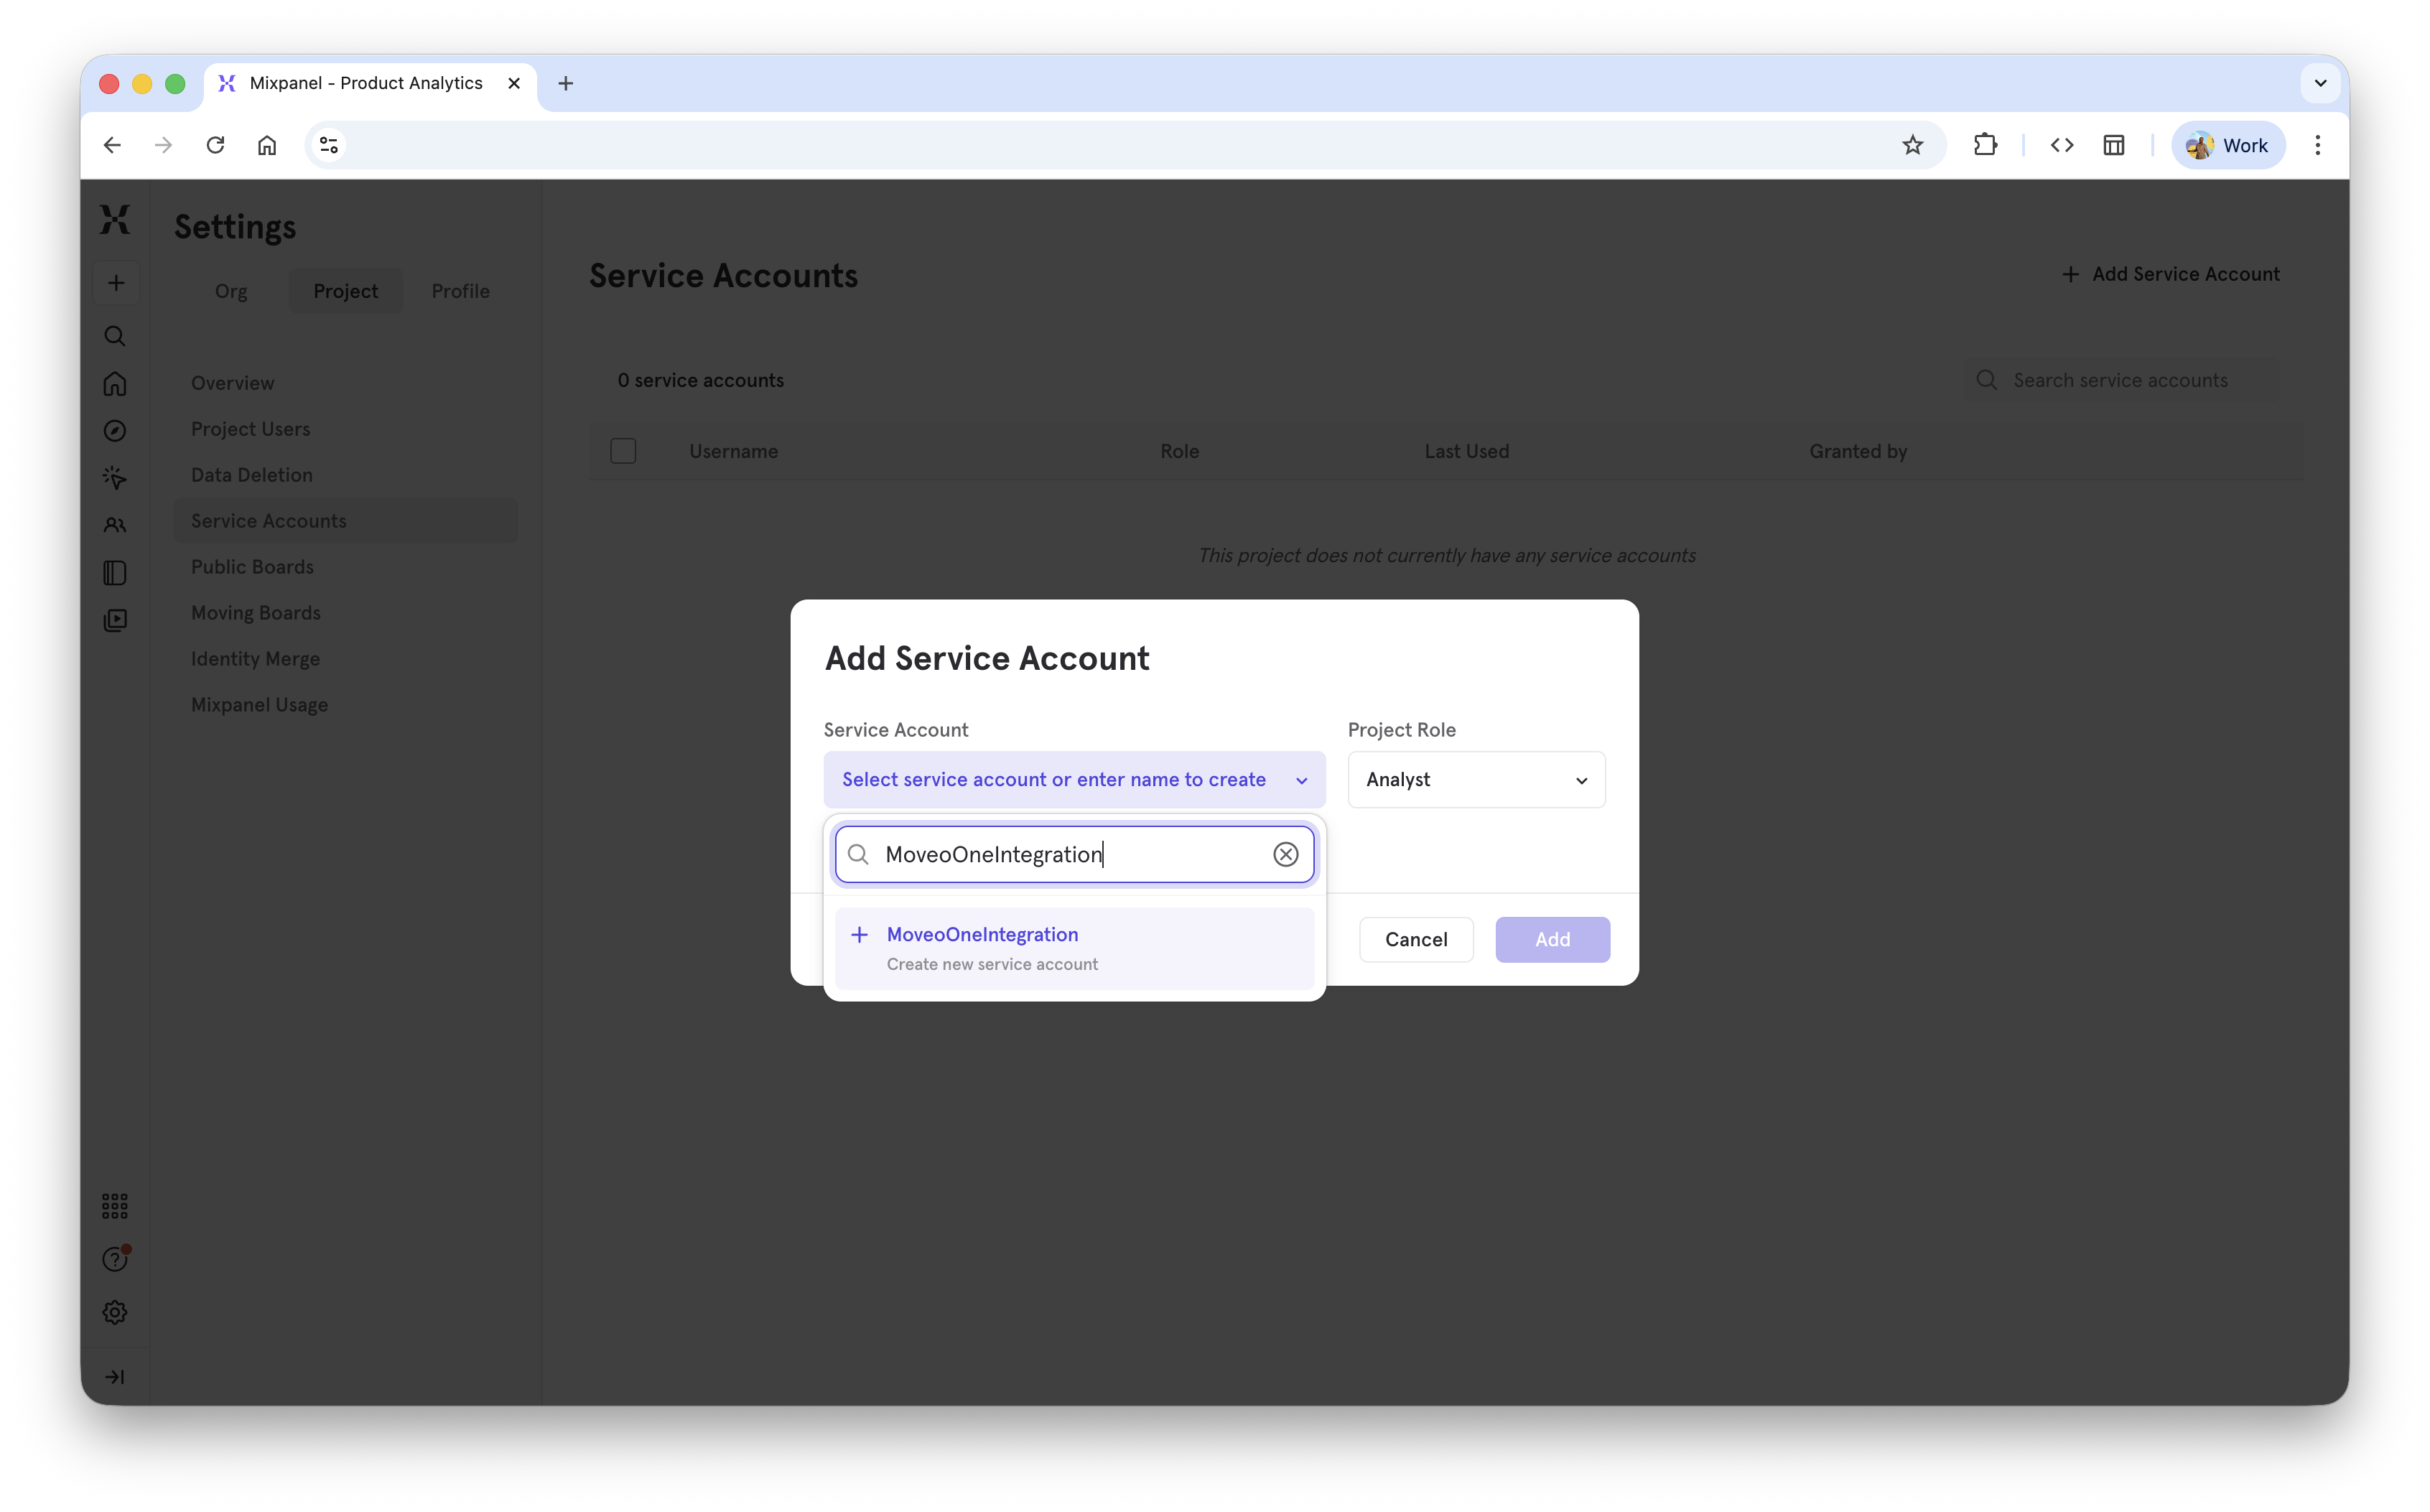
7 — Create Service Account by typing the name
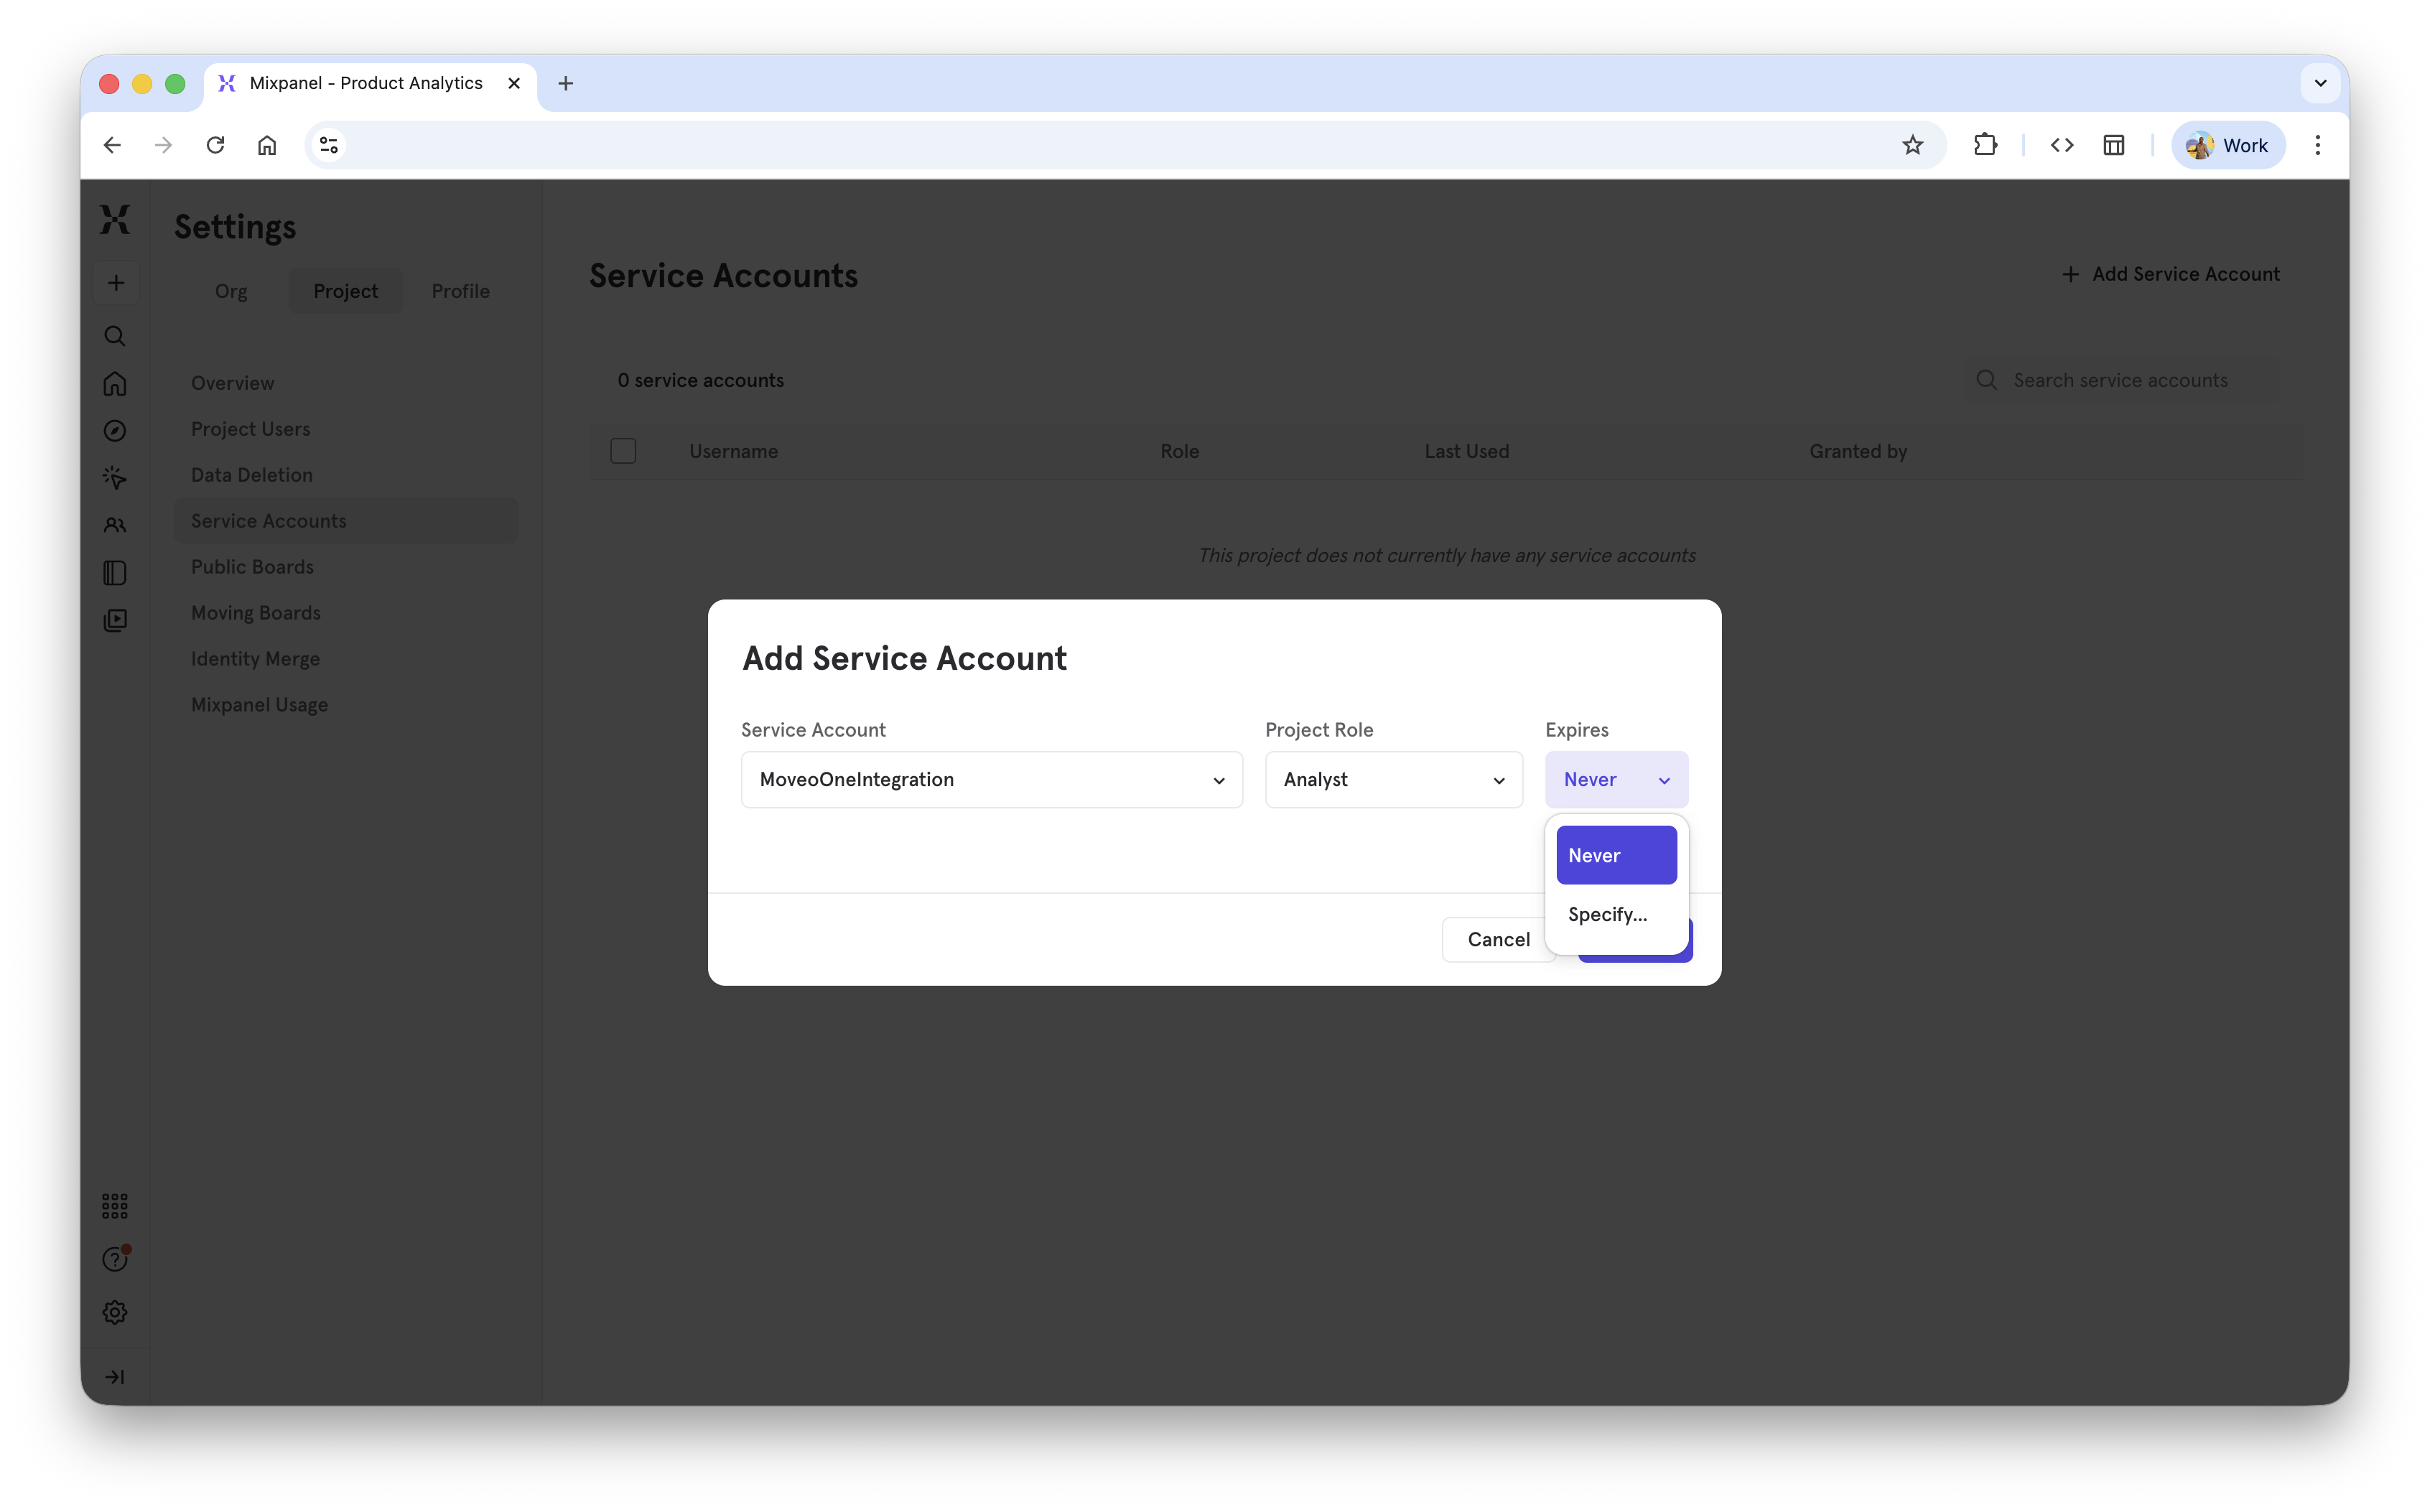
8 — Set Service Account not to expire (default)
9 — ⚠️ Important: Copy secret
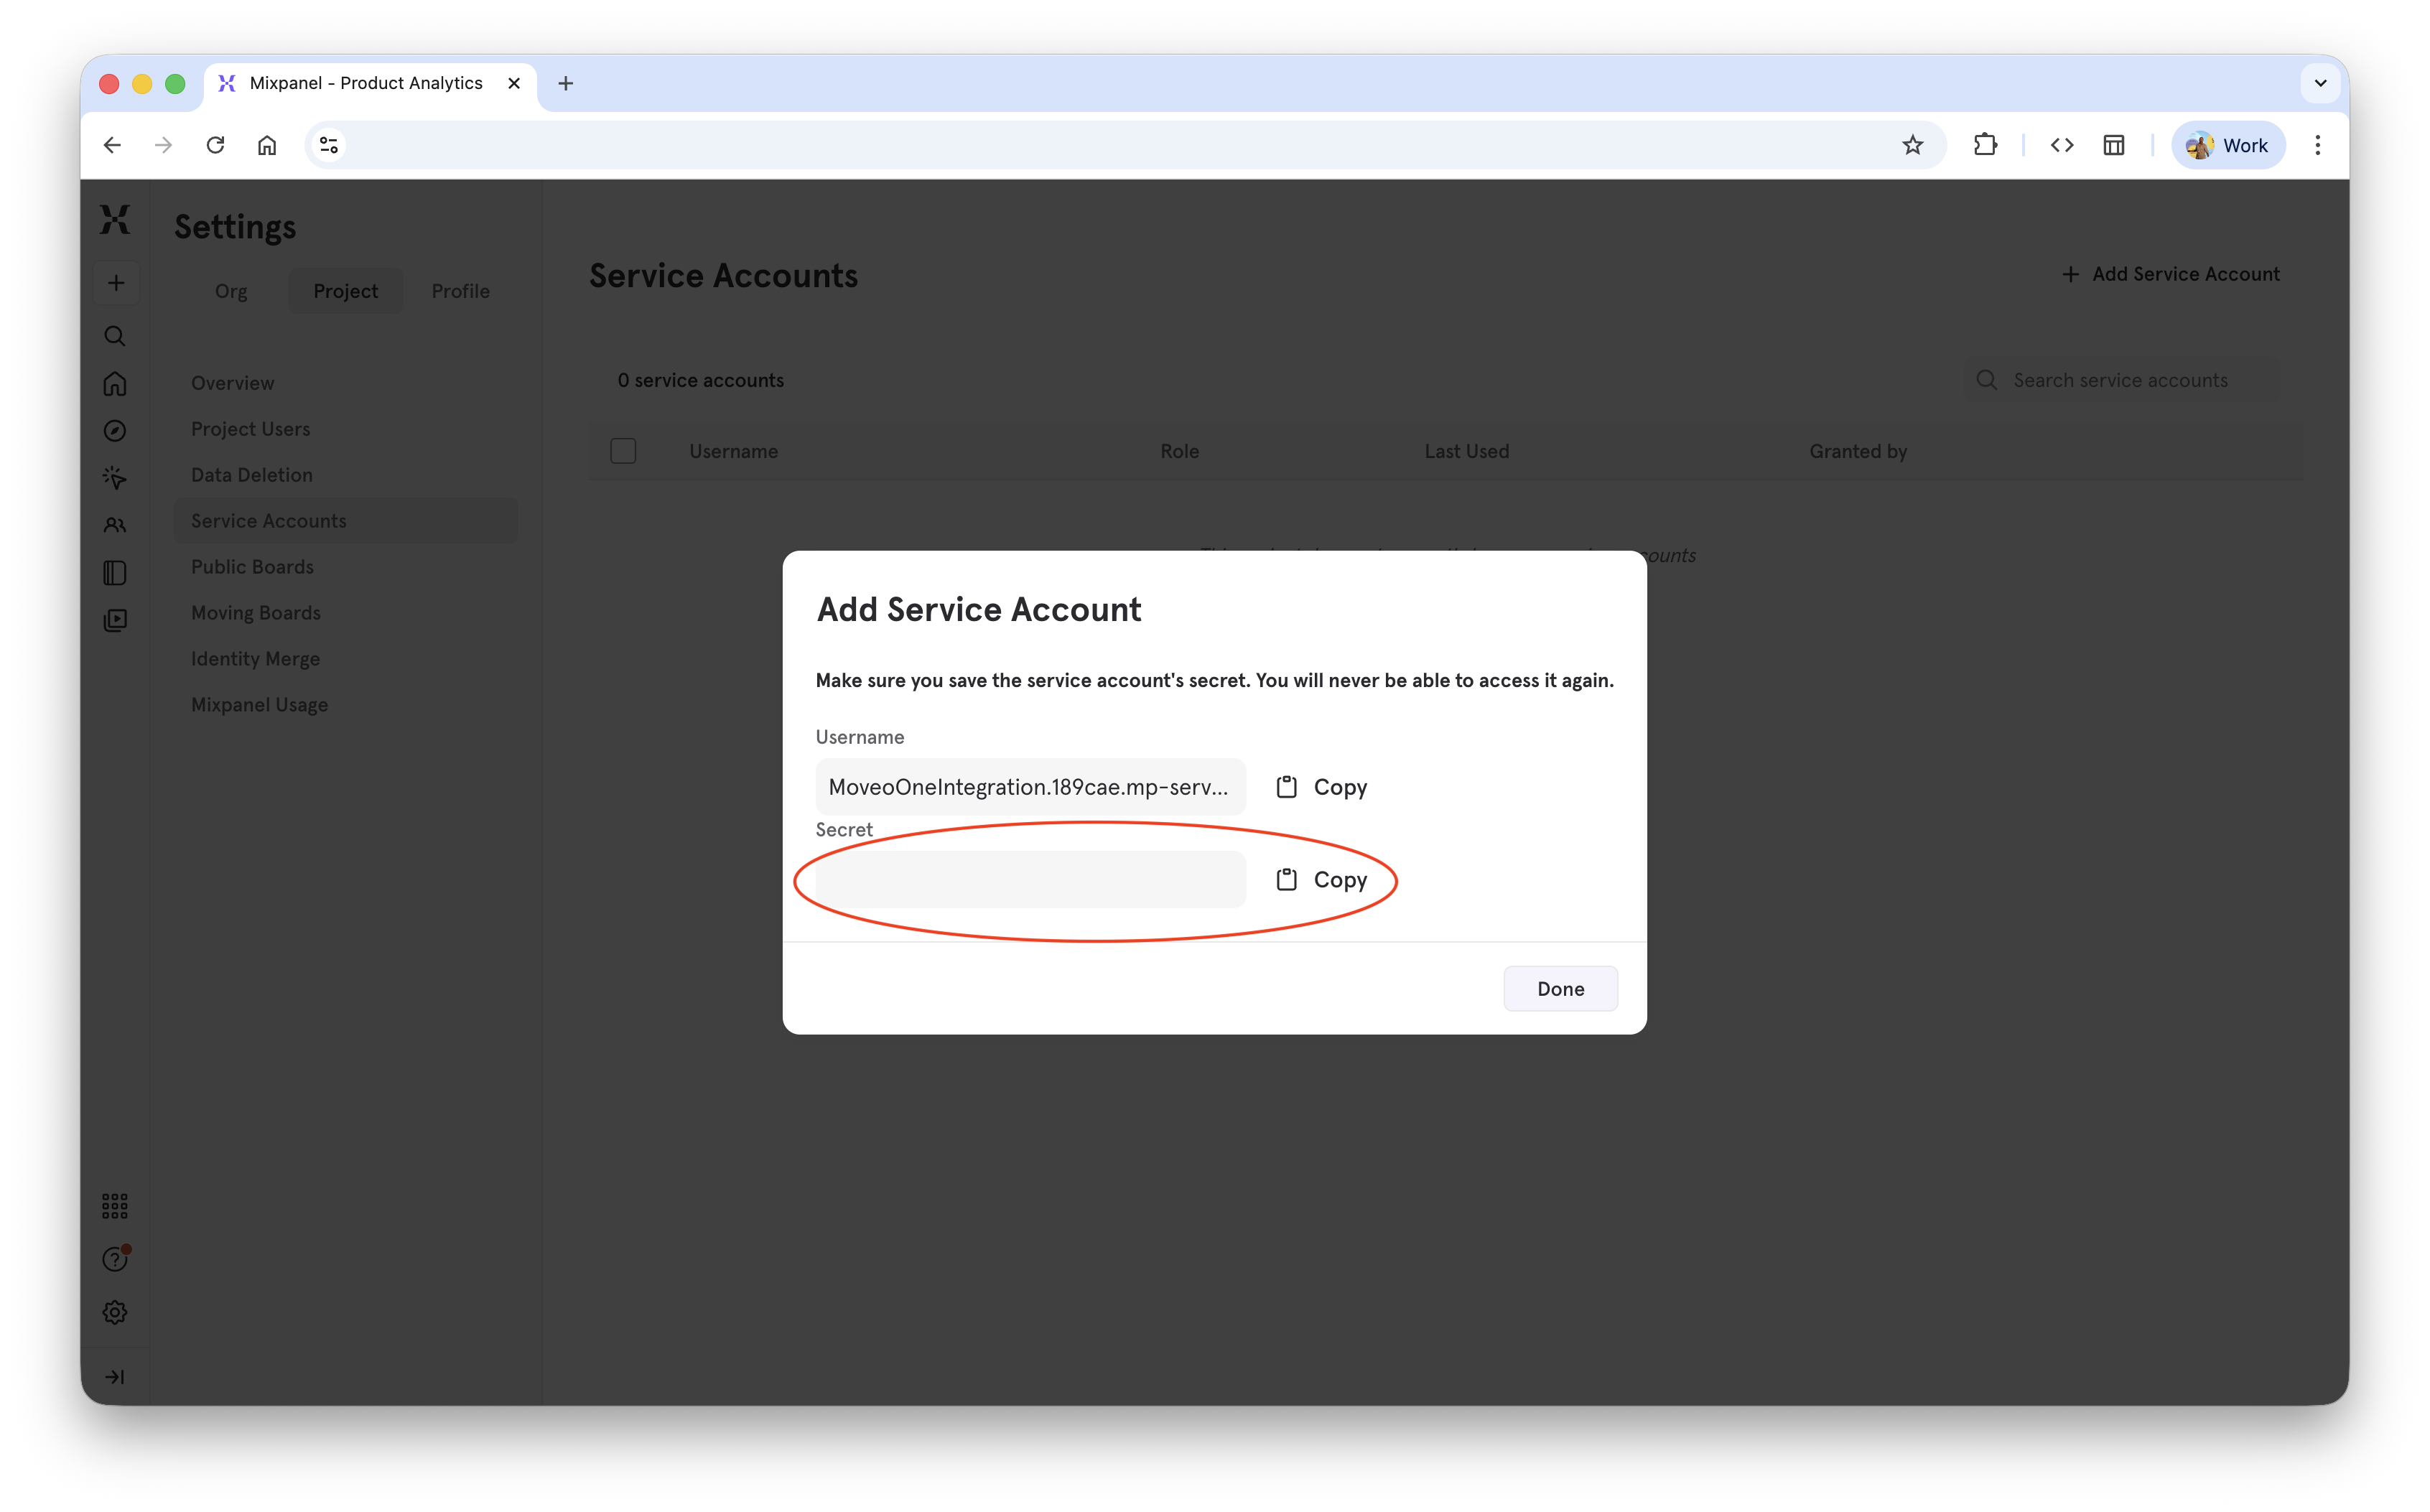 Secret is available only here — make sure you’ve copied it.
Step 2 — Add Connection in Moveo One
In the Moveo One Dashboard:
- Navigate to Integrations → Mixpanel
- Click Add Connection
- Paste your credentials and optionally choose Data Range (e.g., last 90 days)
- Save to start synchronization